FLUX 3 Image Generator & Editor

Create a new image, or change only the part you need.

Generate images from text or edit a photo with a plain instruction, powered by FLUX 3 Image from Black Forest Labs. Combine up to five images and download the result in 1K, 2K, or 4K.

7

Quick start

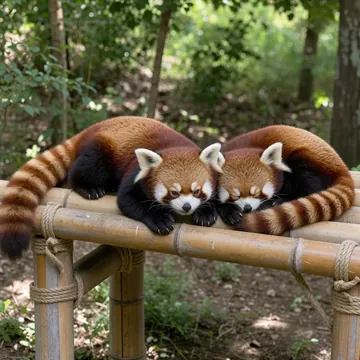
Red pandas
Red pandas

See FLUX 3 Image Edits Side by Side

Each pair below was generated with FLUX 3 Image at 1K: first the original scene, then the edit. The instructions follow examples from Black Forest Labs' documentation. Under each one is how to run the same kind of edit on Flux3Image.

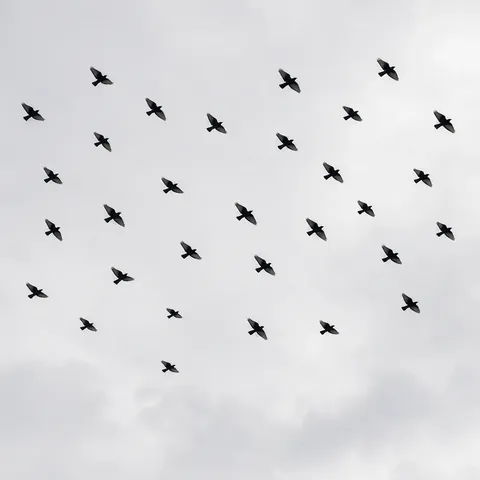
A flock of black birds flying across a pale overcast sky
Before
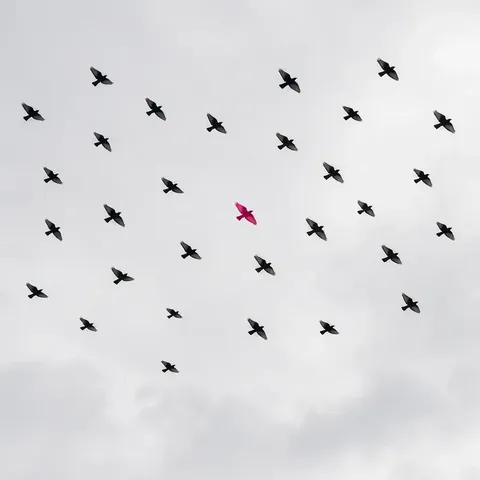
The same flock with one bird in the middle recolored magenta by FLUX 3 Image
After

Recolor One Bird in a Flock

Change the color of only one bird in the middle to #e01075

One bird in the middle turns magenta while the rest of the flock and the pale sky stay as they were. On Flux3Image, upload the photo, point to the element by its position, such as "the bird in the middle", and give the new color. A hex code gives the model an exact target.

Original and edit generated with FLUX 3 Image at 1K.

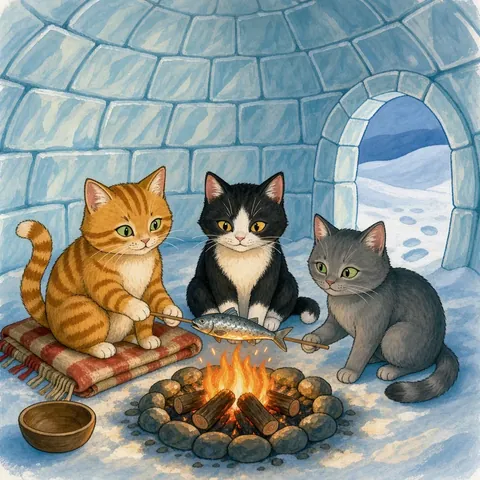
Illustration of three cats around a campfire inside an igloo, an orange tabby on a plaid blanket at left
Before
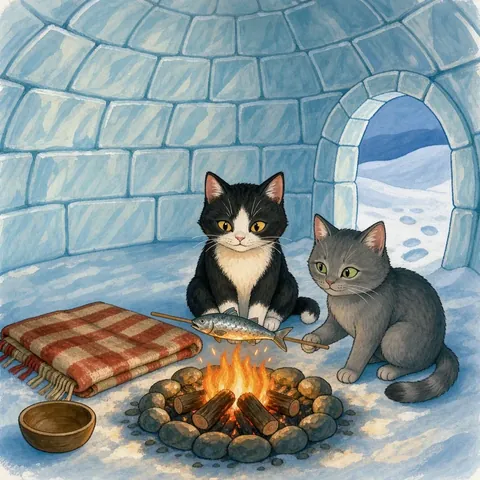
The same igloo scene with the orange tabby removed and the plaid blanket left in its place
After

Remove a Cat from the Scene

Remove the orange tabby cat sitting on the folded blanket on the left and fill the area naturally with the blanket and igloo floor. Keep the other two cats, the campfire, the igloo and the lighting exactly unchanged.

The orange cat is gone and the blanket continues where it sat. On Flux3Image, upload the photo, name the object by its color and position, say what should fill the space, and list what must stay the same.

Original and edit generated with FLUX 3 Image at 1K.

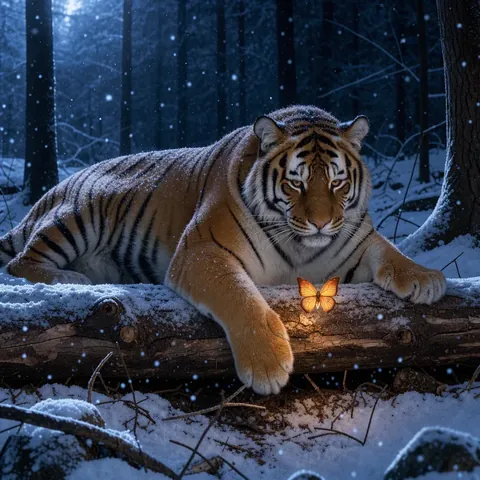
An orange tiger resting on a fallen log in a snowy night forest with a glowing orange butterfly
Before
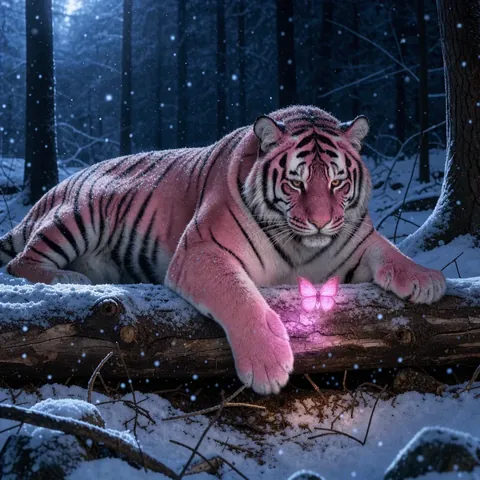
The same forest scene with the tiger and the butterfly recolored pink by FLUX 3 Image
After

Change Two Elements in One Edit

Change the large tiger and the small glowing butterfly to be pink. Keep the massive fallen log, the falling snow, and the dark background trees exactly unchanged.

The tiger and the butterfly both turn pink in a single request, while the log, snow, and forest remain. On Flux3Image, put both changes in one instruction and name everything that should stay unchanged, as the instruction above does.

Original and edit generated with FLUX 3 Image at 1K.

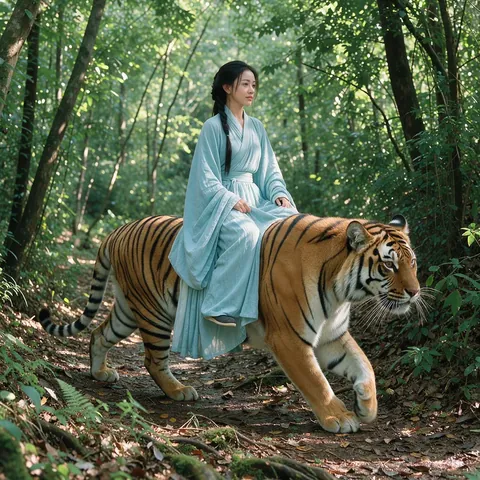
A woman in a light blue robe riding a tiger through a green forest
Before
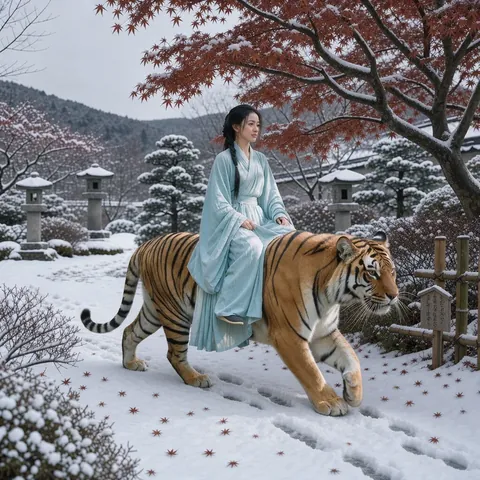
The same rider and tiger in a snowy Japanese garden under a red maple tree
After

Place a Scene in a New Setting

Now they are in a snowy Japanese landscape with a Japanese Maple tree.

The rider and tiger remain while the green forest becomes a snowy garden under a red maple. A change to the whole picture takes one sentence: upload the photo and describe the new setting.

Original and edit generated with FLUX 3 Image at 1K.

How to Use the FLUX 3 Image Generator

1. Start with a Prompt or a Photo

For text to image, describe the subject, setting, lighting, and framing, then pick one of seven aspect ratios, from 1:1 to 16:9. For image to image, upload the photo you want to change. It becomes the main image for the edit.

2. Describe the Change

For an edit, say what should change and name the element by its color, position, or role, such as "the lamp above the table", then list what must stay the same. For a new image, put any text that should appear in quotes.

3. Choose the Output and Check the Cost

Select 1K, 2K, or 4K. The credit cost appears before you generate, and each request produces one image.

4. Review and Download

Open the result at full size to check the details, then download it. Every image is saved to your history with its prompt, so you can reuse the prompt or upload the image for another edit.

Write Edit Instructions That Change Only What You Mean

When you edit a photo, the instruction tells FLUX 3 Image where to work and what to leave alone. A clear edit instruction has three parts:

  • Target: name the element by its color, position, or role, such as "the yellow lamp above the sofa" or "the second line of the headline".
  • Change: state the result you want, such as "make it cobalt blue", "replace it with a ceramic vase", or "remove it and continue the wooden floor".
  • Keep: list what must not move: the background, lighting, camera angle, faces, and any text you are not changing.

For colors, a hex code such as #34eb61 gives an exact target. For text, put the new wording in quotes exactly as it should appear. When several things need to change, describe them in one instruction so the scene stays consistent.

The model reads the whole picture, so shadows, reflections, and lighting near the edit can shift to match the change. If something you wanted to keep has changed, add it to the list of things to keep and run the edit again.
Combine Up to Five Reference Images

An edit can use up to five images: the main image plus four references. The main image comes first and sets the frame for the result. References supply the subject, material, setting, or style you want to bring in.

Refer to images by number and give each one a clear role: "Place the bottle from image 2 on the table in image 1, lit from the left like the rest of the room." When you add another reference, say what it contributes. The more specific the role, the less the model has to guess about which detail comes from which image.

Choose 1K, 2K, or 4K Output

OutputCredits per imageGood for
1K7Exploring ideas and testing edits
2K15Web graphics, social posts, and product listings
4K87Final assets that need fine detail

Work out the subject, placement, wording, and color at 1K, then generate the final version at a higher resolution. New images can use 1:1, 2:3, 3:2, 3:4, 4:3, 9:16, or 16:9. Edits keep the aspect ratio of the main image.

See plans and credit packs

Product Photos, Ads, and Interior Concepts

Product Photos

Start with a product shot and create variations: a different cap color, a new backdrop, or a second colorway for a listing. Name the details that define the product, such as its shape, label, and material, and check each result against the original photo.

Ads and Packaging

Bring in an existing creative to update a headline, change a date, or replace a product name. Say which line to replace, write the new wording in quotes exactly as it should appear, and check spacing and alignment at full size before downloading.

Interior Concepts

Use a photo of a room to try a new sofa color, swap a lamp, or furnish an empty space from product images. Keep the windows, floor, and camera angle in the main image so each concept is easy to compare with the room as it is.

FLUX 3 Image FAQ

  1. 1

    What Is FLUX 3 Image?

    FLUX 3 Image is Black Forest Labs' model for generating and editing images. It creates images from text, edits existing photos from written instructions, and combines several reference images in one request.

  2. 2

    Is FLUX 3 Image Free to Use?

    New accounts receive 7 free credits, enough for one 1K image. After that, images use credits from a monthly or yearly plan or a one-time credit pack: 7 for 1K, 15 for 2K, and 87 for 4K.

  3. 3

    Can I Edit an Existing Photo Instead of Generating a New One?

    Yes. Upload a photo and write an instruction for the change, such as a new color, a removed object, or a different background. The photo stays the main image, so the result keeps its framing and aspect ratio.

  4. 4

    How Do I Change One Part of an Image and Keep the Rest?

    Name the part you want to change by its color, position, or role, describe the edit, and list what must stay the same, such as the background, lighting, and other objects. Shadows and reflections near the edit can adjust to fit.

  5. 5

    How Many Reference Images Can I Use?

    Up to five per request: one main image and four references. Refer to each by its number and say what it contributes.

  6. 6

    Where Are My Images Saved?

    Every image you generate is saved to your private history with its prompt and settings. From there you can download it, reuse its prompt, or upload it again as the starting photo for another edit.

  7. 7

    Which Output Size Should I Choose?

    Use 1K to explore ideas, 2K for most web and social use, and 4K for final assets that need the most detail.

Start Your Next Image

Write a prompt, or upload the photo you want to change.